Blog Writing Guide
Introduction
Writing blog posts for Matrix AI should be a structured and engaging process. This guide provides a step-by-step approach, from idea generation to publishing, ensuring high-quality content that aligns with our brand and follows our documentation standards.
Idea Generation
New article topics should stem from relevant discussions, technical insights, integrations, speculative features, tutorials, and challenges we have encountered. If writing about Polykey, for instance, we may introduce theories, new features, or technical discussions.
Drafting the Narrative
- Start with a structured outline to ensure logical flow and coherence. Keep the post engaging while maintaining a professional tone.
- Leverage AI for idea generation but refine manually.
- Use ChatGPT to brainstorm and expand on concepts, but curate and humanize the content to align with Matrix AI's voice.
- Treat AI suggestions as raw material, not final content. Edit and structure outputs meaningfully.
- Ensure flexibility in formatting and avoid excessive structure.
- Keep content human-written by:
- Avoiding non-standard characters (e.g., long dashes, curved quotes).
- Eliminating redundancy and emojis.
- Focusing on clarity and readability.
Syntax and Formatting Guidelines
All blog posts should be written in Markdown. At the beginning of the file, include the required frontmatter:
title: "Your Blog Post Title"
date: YYYY-MM-DD
author: "Your Name"
tags: [Relevant, Keywords, Here]
Markdown Standards
-
Use clear headers (`##` for main sections, `###` for subsections).
-
Use inline code with backticks (`like this`) and code blocks for scripts:
def example():
print("Hello, World!")- Format images properly using absolute paths:
[Descriptive Alt Text](/images/image.png) -
Store images in the repository, ensuring they are compressed for performance, and written in kabob-text
Publishing and Review Process
Before publishing, follow these steps to ensure quality and consistency:
Pre-Publishing Review
- Check spelling and grammar.
- Ensure clarity, conciseness, and alignment with Matrix AI's voice. Read it out loud to yourself or try to read it to someone else; is it natural? Are you explaining yourself well enough to teach it?
- Validate adherence to formatting guidelines.
Git Workflow
-
Check the current status of your repository first to check if there's unstaged changes, uncomitted changes or unpushed commits.
git status -
Ensure your local repository is up to date by pulling the latest changes:
git pull origin staging -
Create a branch for your article using Git.
git checkout -b feature-give-it-a-unique-name -
Switch to a new branch:
git checkout -b your-document-title -
Create and add your blog post file. Generate a new Markdown file for your blog:
touch "# Your Document Title" > your-document title.mdThen, stage the file for commit:
git add your-document-title.md -
Commit your changes. Commit your new file with a descriptive message:
git commit -m "feat: add your document title" -
Push the draft to the repository. Ensure your branch is correctly tracking the remote repository:
git push --set-upstream origin feature-your-document-title -
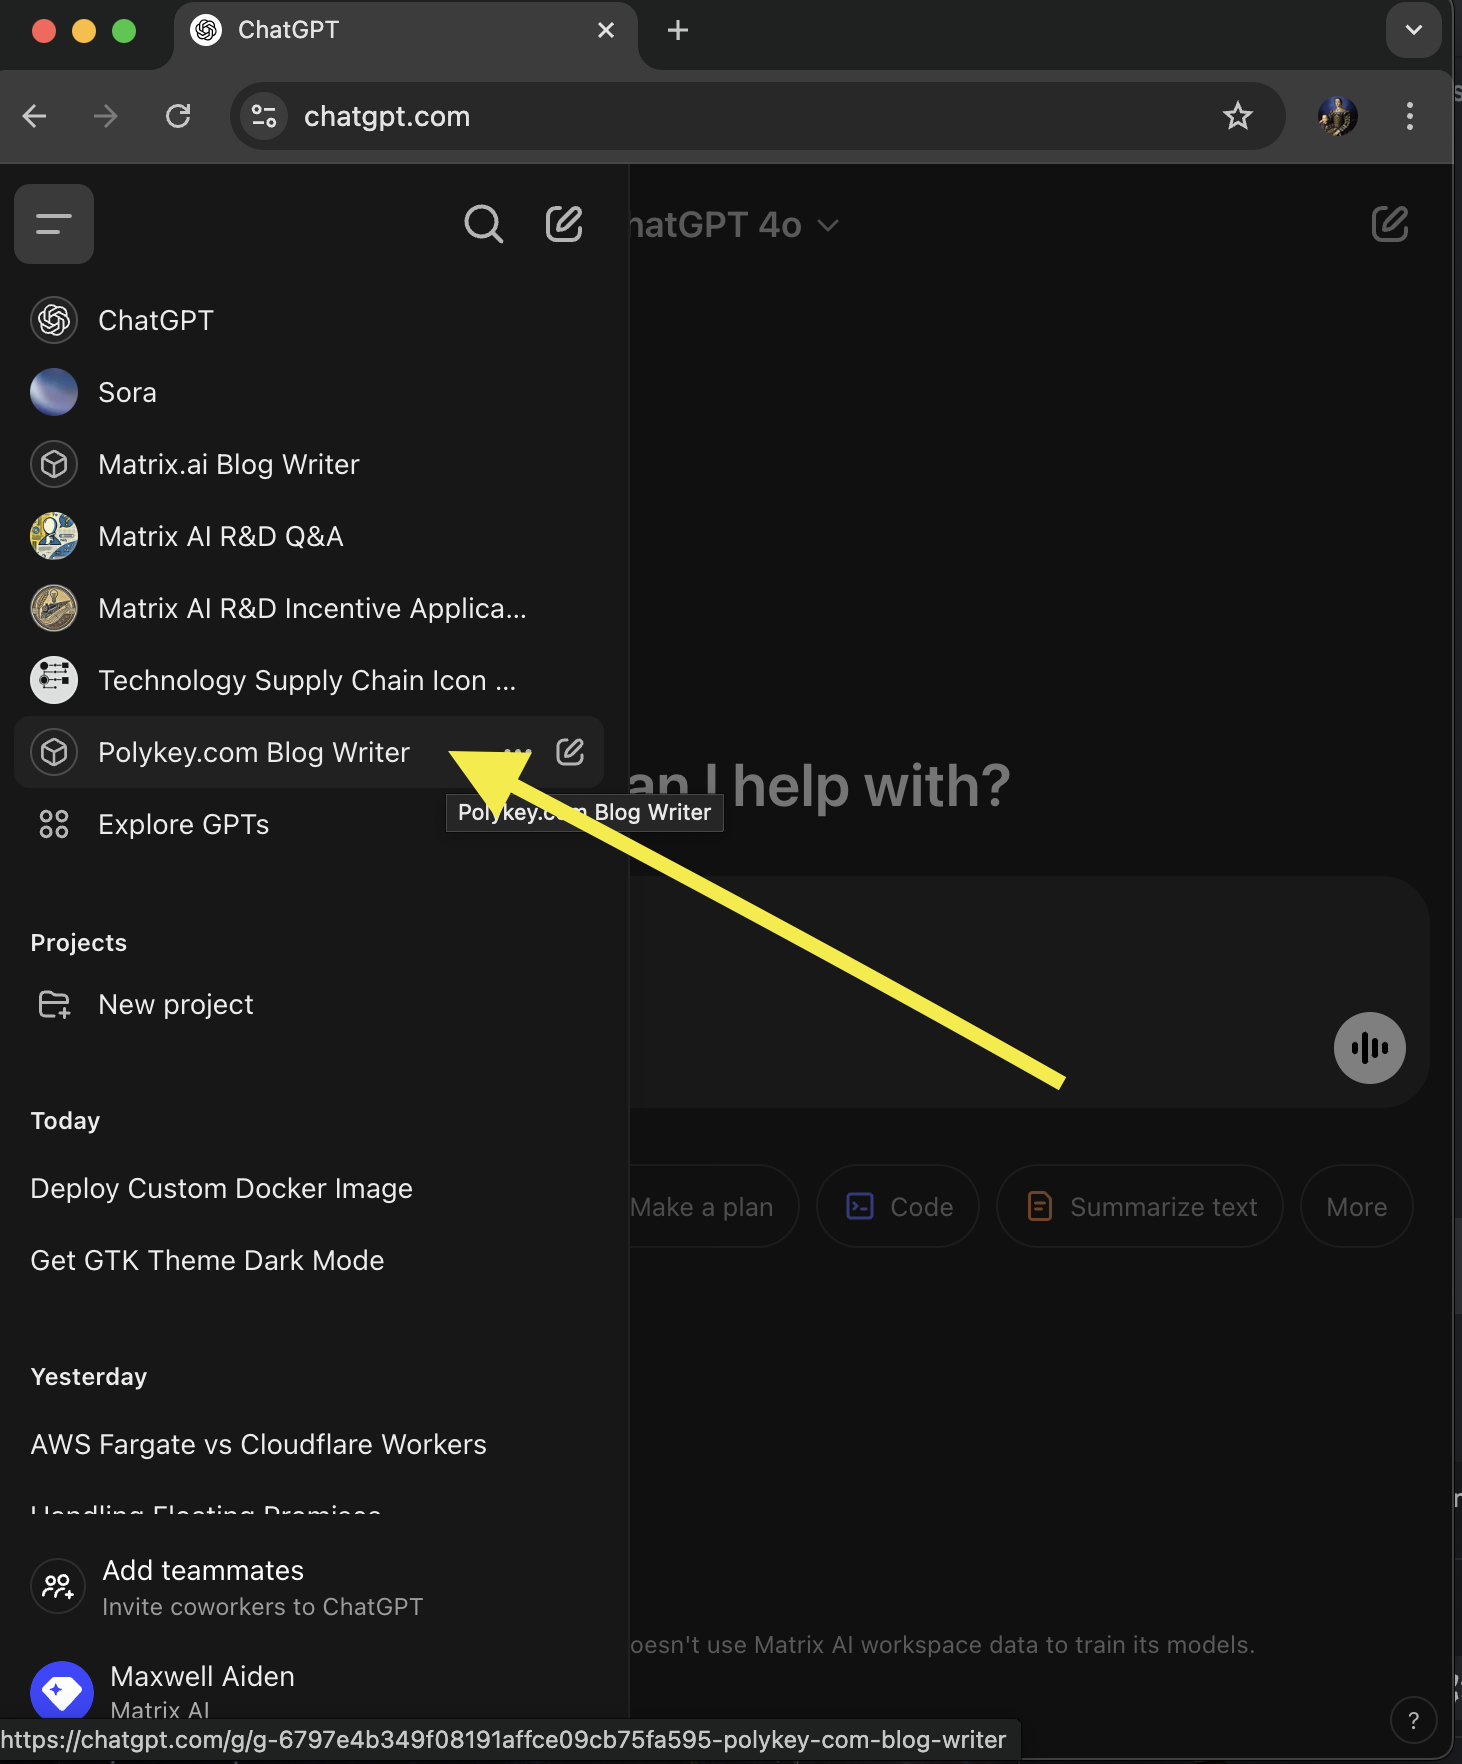
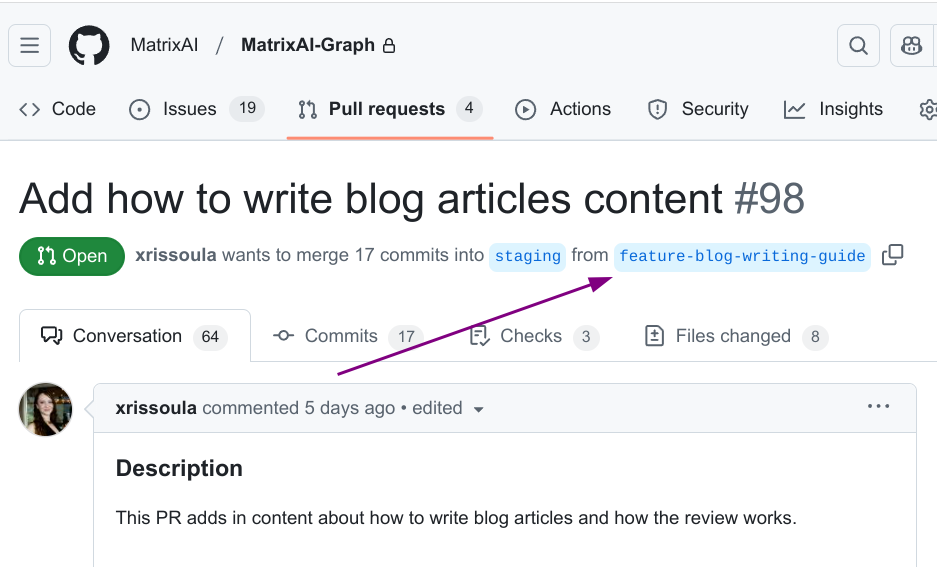
Submit a pull request (PR) for peer review. To submit your changes for review, create a pull request. If using GitHub CLi:
   gh pr create \
    --base main \
    --head feature-your-document-title \
    --title "Your Document Title" \
    --body "This PR adds a Your Document Title."
Alternatively, go to Github and create the PR manually. Make sure you choose the correct "base" and "compare" branches.
Fill out the Description based on the native template. Manually assign yourself and the intended reviewer.
Use the PR system for feedback and revisions. Do not merge before your work is reviewed. Before merging, ensure your branch is up to date with the latest changes from main. You can add inline comments on individual lines of code. Make any necessary changes by comitting and pushing updates to the same branch.
 !
!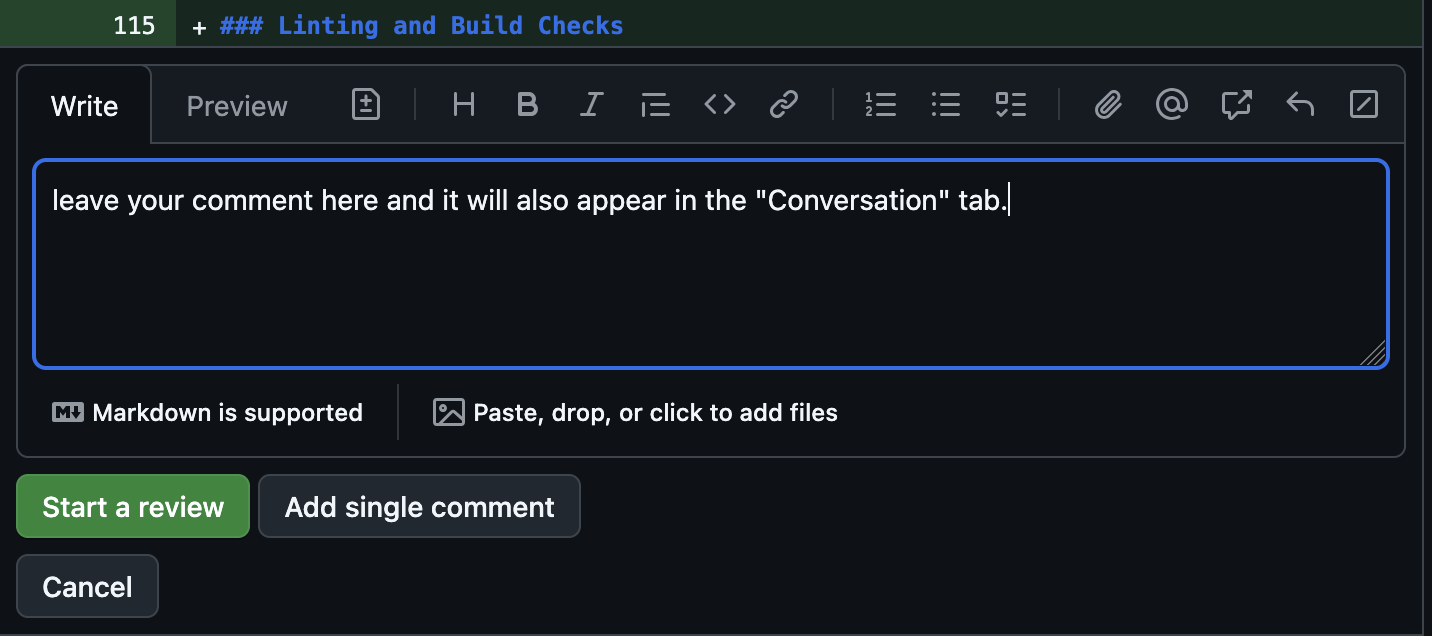
When reviewing a pull request, you have two options:
- "Start a review": This allows you to add multiple comments before submitting them all at once. Use this when providing feedback on multiple parts of a PR and submitting everything together.
- "Add single comment": This immediately posts your comment. Use this for quick, one-off suggestions that don't require a full review.
Final Review and Approval
- Once the PR is approved, notify @CMCDragonkai for the final check.
Additional Technical Considerations
Image and Asset Handling
- Store images in designated folders within the repository.
- Use optimized and compressed image formats. For raster images, the preferreed format is webp. For vector images, svg.
- Large rasters are not allowed. We have a limit of 25 MiB. Keep the images small.
- Always use absolute paths (
/images/...) for images and file references. This ensures compatibility across different environments. See the README.md of zeta.house or polykey.com for more details.
Exporting SVGs with Excalidraw
If using Excalidraw for diagrams, ensure proper SVG exports and referencing within the blog post.
Here is an example of selecting and exporting an image in Excalidraw:
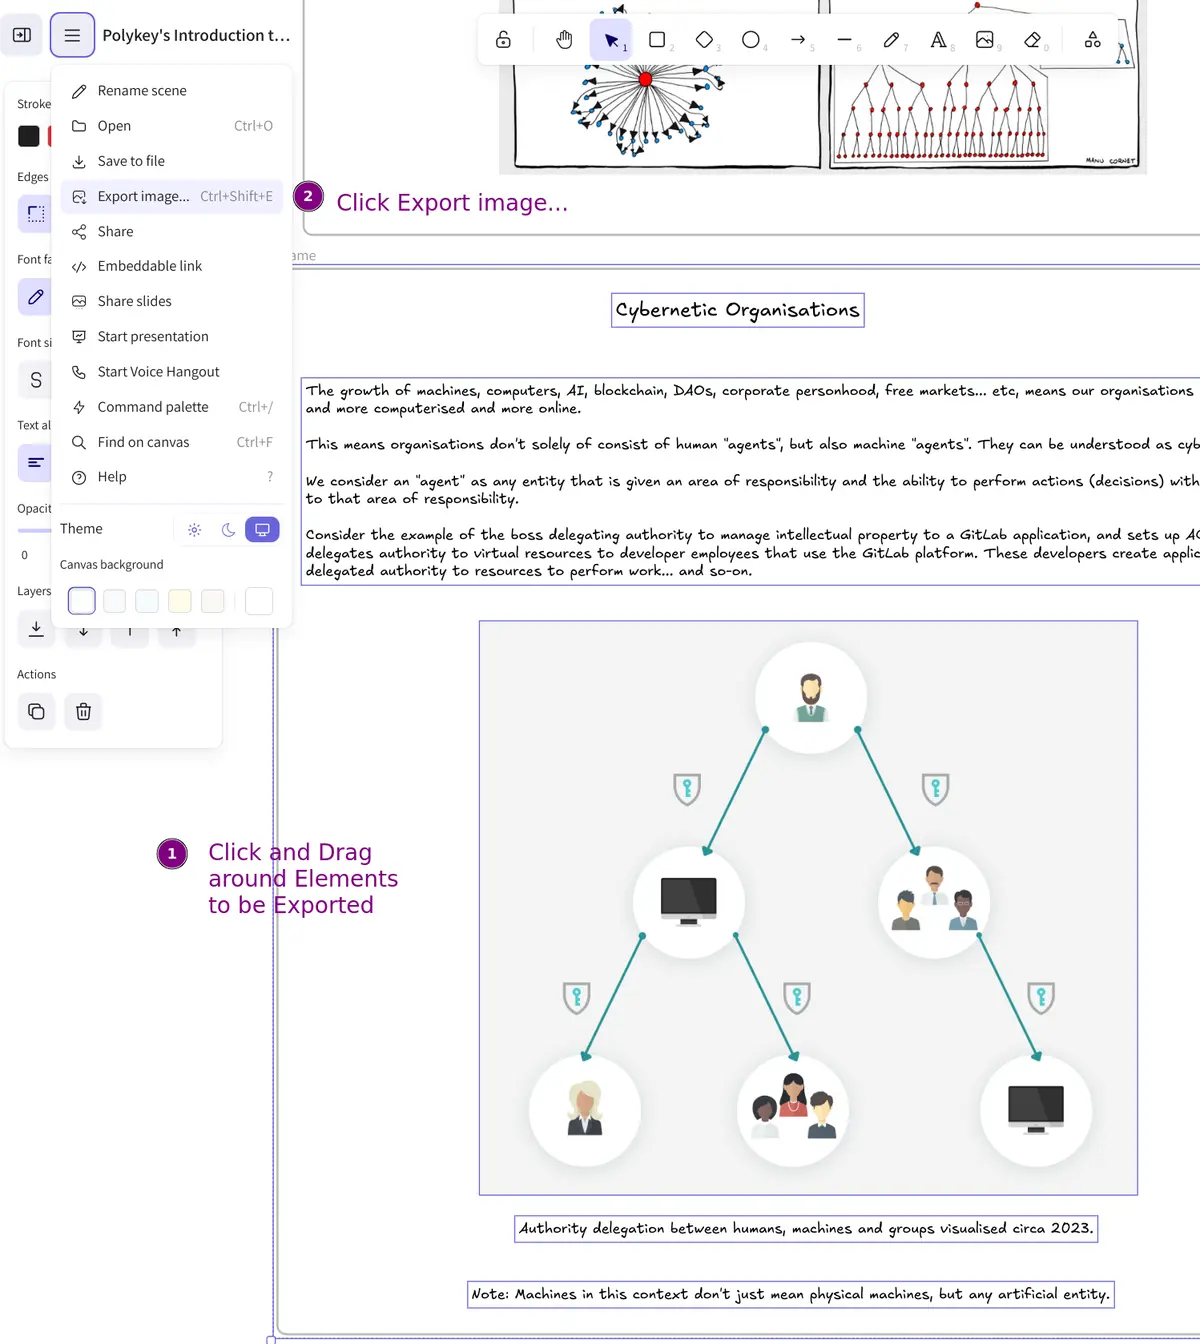
Selecting elements to be exported from Excalidraw.
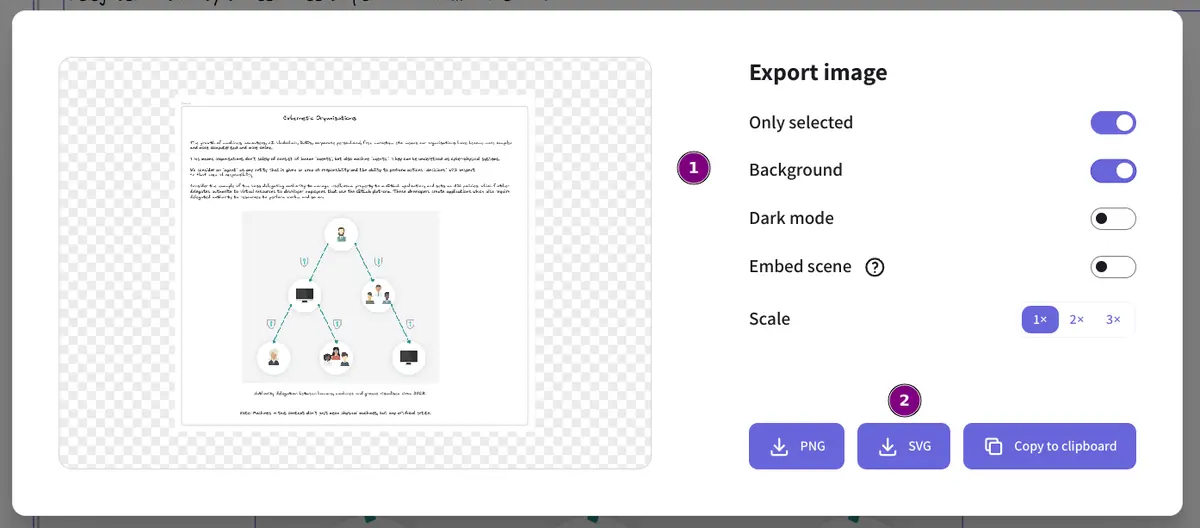
Exporting an image from Excalidraw with the appropriate settings.
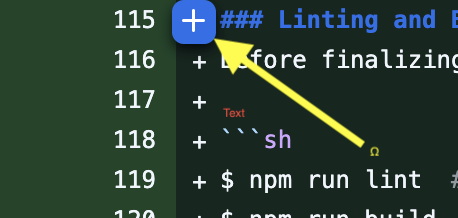
Linting and Build Checks
Before finalizing your post, run the following commands:
npm run lint  # Lint the Markdown files
npm run build  # Perform a sanity build check
npm run start  # Start a local build preview
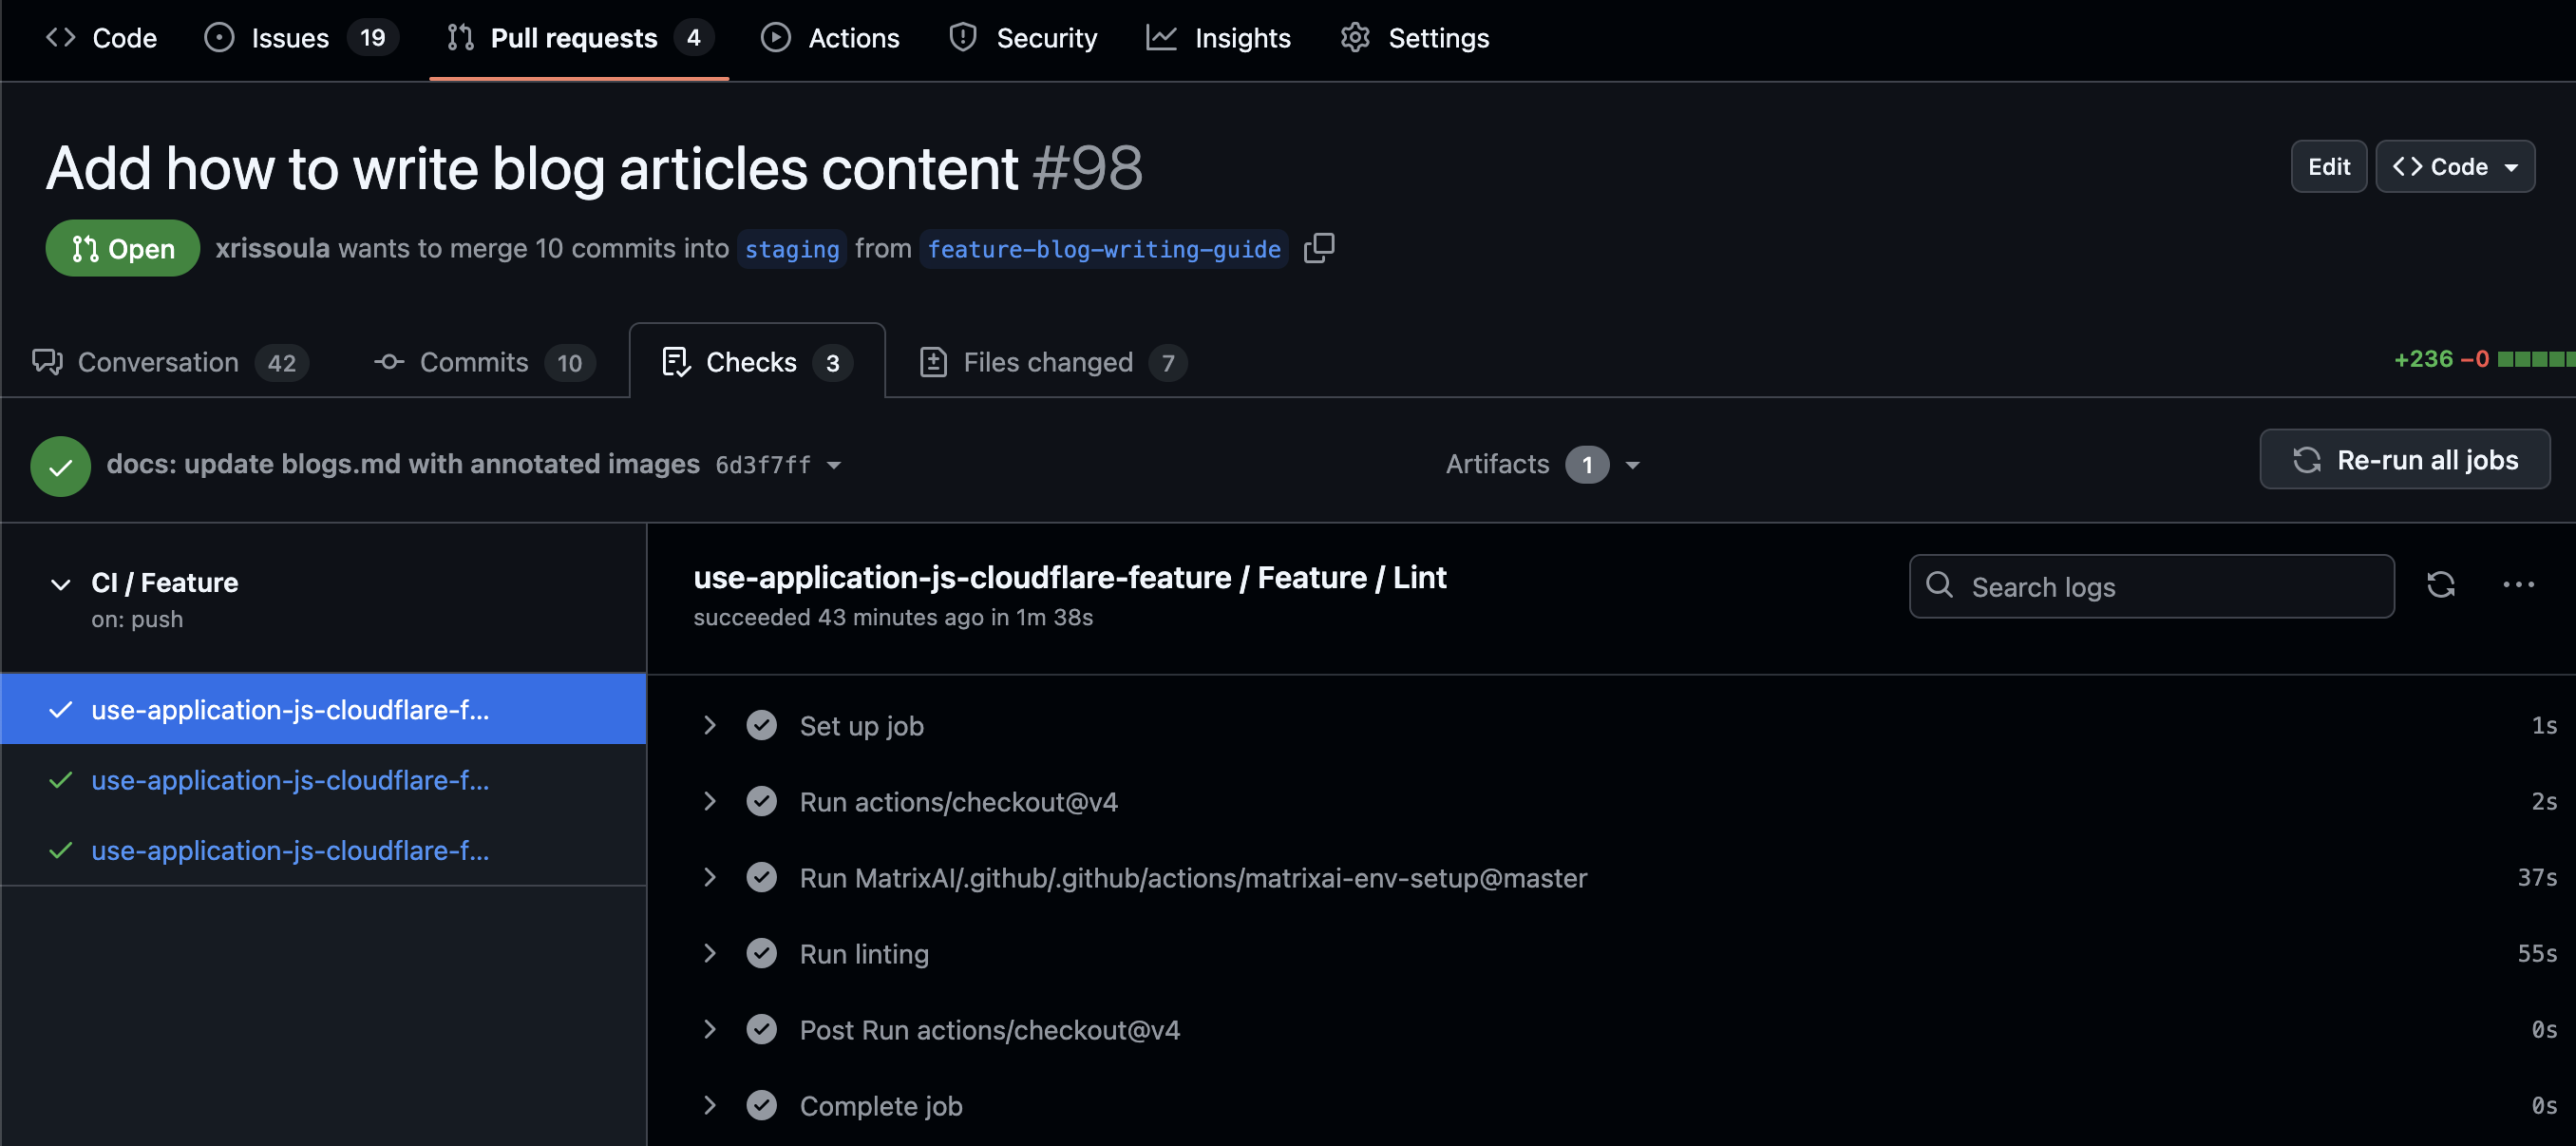
Review the deployed feature branch to confirm the article appears correctly. The GitHub preview of the feature branch can serve as a reference to ensure proper formatting and rendering. If the document looks correct in GitHub's markdown preview and all CI checks pass, it is generally safe to proceed with merging.
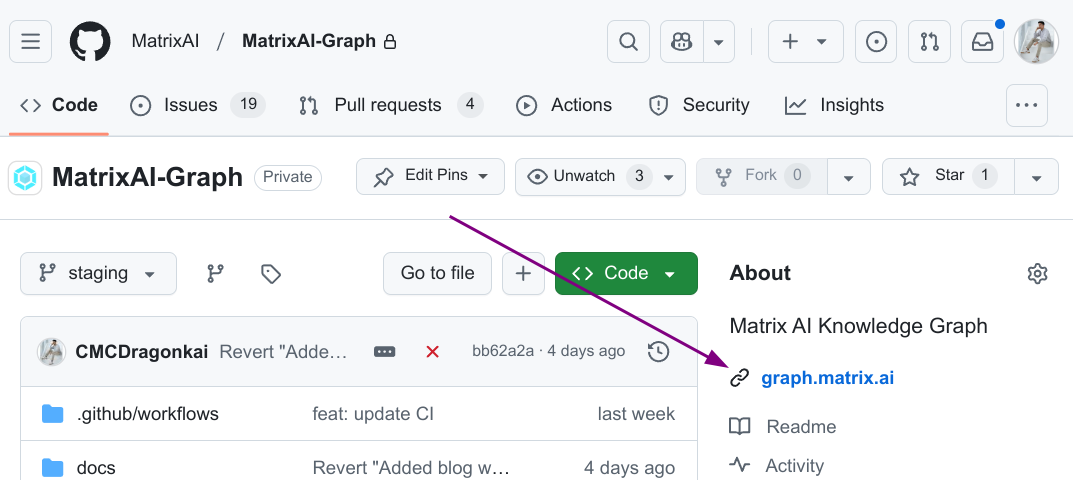
Use the branch name to find the deployed URL for example: https://feature-blog-writing-guide.dev.graph.matrix.ai.
Example of Successful CI Checks:
Verifying Deployment
After running linting and build checks, you should verify that the deployed version of your document appears correctly.
- Check the deployed version
- Ensure that the check job use-application-js-cloudflare-feature / Feature / Deployment has successfully completed before proceeding.
Merging and Publishing
Once all checks and reviews are complete, merge the PR and push the changes to production. Ensure the final post meets Matrix AI's standards and contributes meaningful content to our audience.
By following this guide, you will create polished, high-quality content that enhances our knowledge base and engages our readers.